A maioria do código que é escrito recorrendo às bibliotecas Selenium envolve trabalhar com elementos.
This is the multi-page printable view of this section. Click here to print.
Elemento Web
Identificando e trabalhando com elementos no DOM.
- 1: File Upload
- 2: Encontrando Elementos Web
- 3: Interacting with web elements
- 4: Information about web elements
- 5: Localizando elementos
1 - File Upload
Como subir arquivos com Selenium
A caixa de diálogo para o envio de arquivos pode ser tratada com o Selenium, quando o elemento de entrada é do tipo “file”. Pode observar um exemplo neste link https://the-internet.herokuapp.com/upload .
Será necessário ter o arquivo a subir disponível para a operação. Apresentamos alguns exemplos de código para subir os arquivos em diversas linguagens de programação:
import java.util.concurrent.TimeUnit;
import org.openqa.selenium.By;
import org.openqa.selenium.WebDriver;
import org.openqa.selenium.chrome.ChromeDriver;
class fileUploadDoc{
	public static void main(String[] args) {
		WebDriver driver = new ChromeDriver();
		driver.manage().timeouts().implicitlyWait(10, TimeUnit.SECONDS);
		driver.get("https://the-internet.herokuapp.com/upload");
		//we want to import selenium-snapshot file.
		driver.findElement(By.id("file-upload")).sendKeys("selenium-snapshot.jpg");
		driver.findElement(By.id("file-submit")).submit();
		if(driver.getPageSource().contains("File Uploaded!")) {
			System.out.println("file uploaded");
		}
		else{
				System.out.println("file not uploaded");
			}
		driver.quit();
	}
}
from selenium import webdriver
driver.implicitly_wait(10)
driver.get("https://the-internet.herokuapp.com/upload");
driver.find_element(By.ID,"file-upload").send_keys("selenium-snapshot.jpg")
driver.find_element(By.ID,"file-submit").submit()
if(driver.page_source.find("File Uploaded!")):
    print("file upload success")
else:
    print("file upload not successful")
driver.quit()
using System;
using OpenQA.Selenium;
using OpenQA.Selenium.Chrome;

namespace SeleniumDocumentation.SeleniumPRs
{
    class FileUploadExample
    {
        static void Main(String[] args)
        {
            IWebDriver driver = new ChromeDriver();
            try
            {
                // Navigate to Url
                driver.Navigate().GoToUrl("https://the-internet.herokuapp.com/upload");
                driver.FindElement(By.Id("file-upload")).SendKeys("selenium-snapshot.jpg");
                driver.FindElement(By.Id("file-submit")).Submit();
                if (driver.PageSource.Contains("File Uploaded!"))
                {
                    Console.WriteLine("file uploaded");
                }
                else
                {
                    Console.WriteLine("file not uploaded");
                }
                driver.Quit();

            }

            }
}
require 'selenium-webdriver'
driver = Selenium::WebDriver.for :chrome
driver.get("https://the-internet.herokuapp.com/upload")
driver.find_element(:id,"file-upload").send_keys("selenium-snapshot.jpg")
driver.find_element(:id,"file-submit").submit()

if driver.page_source().include? "File Uploaded!"
  puts "file upload success"
else
  puts "file upload not successful"
end
      await driver.get('https://www.selenium.dev/selenium/web/upload.html');
      // Upload snapshot
      await driver.findElement(By.id("upload")).sendKeys(image);
await driver.findElement(By.id("go")).submit();import org.openqa.selenium.By
import org.openqa.selenium.chrome.ChromeDriver
fun main() {
val driver = ChromeDriver()
driver.get("https://the-internet.herokuapp.com/upload")
driver.findElement(By.id("file-upload")).sendKeys("selenium-snapshot.jpg")
driver.findElement(By.id("file-submit")).submit()
if(driver.pageSource.contains("File Uploaded!")) {
println("file uploaded")
}
else{
println("file not uploaded")
}
}Esperamos que estes exemplos de código possam ajudar a compreender como subir um arquivo com Selenium.
2 - Encontrando Elementos Web
Localizando elementos com base nos valores providenciados pelo localizador.
Um dos aspectos mais fundamentais do uso do Selenium é obter referências de elementos para trabalhar. O Selenium oferece várias estratégias de localizador para identificar exclusivamente um elemento. Há muitas maneiras de usar os localizadores em cenários complexos. Para os propósitos desta documentação, vamos considerar este trecho de HTML:
<ol id="vegetables">
 <li class="potatoes">…
 <li class="onions">…
 <li class="tomatoes"><span>O tomate é um vegetal</span>…
</ol>
<ul id="fruits">
  <li class="bananas">…
  <li class="apples">…
  <li class="tomatoes"><span>O tomate é uma fruta</span>…
</ul>
Primeiro Elemento correspondente
Muitos localizadores irão corresponder a vários elementos na página. O método de elemento de localização singular retornará uma referência ao primeiro elemento encontrado dentro de um determinado contexto.
Avaliando o DOM inteiro
Quando o metodo find element é chamado na instância do driver, ele retorna uma referência ao primeiro elemento no DOM que corresponde ao localizador fornecido. Esse valor pode ser guardado e usado para ações futuras do elemento. Em nosso exemplo HTML acima, existem dois elementos que têm um nome de classe de “tomatoes” então este método retornará o elemento na lista “vegetables”.
WebElement vegetable = driver.findElement(By.className("tomatoes"));
vegetable = driver.find_element(By.CLASS_NAME, "tomatoes")
var vegetable = driver.FindElement(By.ClassName("tomatoes"));
vegetable = driver.find_element(class: 'tomatoes')
const vegetable = await driver.findElement(By.className('tomatoes'));
val vegetable: WebElement = driver.findElement(By.className("tomatoes"))
Avaliando um subconjunto do DOM
Ao em vez de tentar encontrar um localizador unico no DOM inteiro, normalmente é útil restringir a busca ao escopo de outro elemento já localizado. No exemplo acima existem dois elementos com um nome de classe de “tomatoes” e é um pouco mais desafiador obter a referência para o segundo.
Uma possível solução seria localizar um elemento com um atributo único que seja um ancestral do elemento desejado e não um ancestral do elemento indesejado, então invoque o find element nesse objeto:
WebElement fruits = driver.findElement(By.id("fruits"));
WebElement fruit = fruits.findElement(By.className("tomatoes"));
fruits = driver.find_element(By.ID, "fruits")
fruit = fruits.find_element(By.CLASS_NAME,"tomatoes")
IWebElement fruits = driver.FindElement(By.Id("fruits"));
IWebElement fruit = fruits.FindElement(By.ClassName("tomatoes"));
fruits = driver.find_element(id: 'fruits')
fruit = fruits.find_element(class: 'tomatoes')
const fruits = await driver.findElement(By.id('fruits'));
const fruit = fruits.findElement(By.className('tomatoes'));
val fruits = driver.findElement(By.id("fruits"))
val fruit = fruits.findElement(By.className("tomatoes"))
Java e C#
As classes WebDriver, WebElement e ShadowRoot todas implementam o SearchContext interface, que é
considerada uma role-based interface(interface baseada em função). As interfaces baseadas em função permitem determinar se uma determinada
implementação de driver suporta um recurso específico. Essas interfaces são claramente definidas e tentam
aderir a ter apenas um único papel de responsabilidade.
Localizador otimizado
Uma pesquisa aninhada pode não ser a estratégia de localização mais eficaz, pois requer dois comandos separados a serem emitidos para o navegador.
Para melhorar um pouco o desempenho, podemos usar CSS ou XPath para encontrar esse elemento com um único comando. Veja as sugestões de estratégia do localizador na nossa sessão de Práticas de teste incentivadas.
Para esse exemplo, utilizaremos o CSS Selector:
WebElement fruit = driver.findElement(By.cssSelector("#fruits .tomatoes"));
fruit = driver.find_element(By.CSS_SELECTOR,"#fruits .tomatoes")
var fruit = driver.FindElement(By.CssSelector("#fruits .tomatoes"));
fruit = driver.find_element(css: '#fruits .tomatoes')
const fruit = await driver.findElement(By.css('#fruits .tomatoes'));
val fruit = driver.findElement(By.cssSelector("#fruits .tomatoes"))
Todos os elementos correspondentes
Existem vários casos de uso para a necessidade de obter referências a todos os elementos que correspondem a um localizador, em vez do que apenas o primeiro. Os métodos plurais find elements retornam uma coleção de referências de elementos. Se não houver correspondências, uma lista vazia será retornada. Nesse caso, referências a todos os itens da lista de frutas e vegetais serão devolvidas em uma coleção.
List<WebElement> plants = driver.findElements(By.tagName("li"));
plants = driver.find_elements(By.TAG_NAME, "li")
IReadOnlyList<IWebElement> plants = driver.FindElements(By.TagName("li"));
plants = driver.find_elements(tag_name: 'li')
const plants = await driver.findElements(By.tagName('li'));
val plants: List<WebElement> = driver.findElements(By.tagName("li"))
Obter Elemento
Muitas vezes você obterá uma coleção de elementos, mas quer trabalhar apenas com um elemento específico, o que significa que você precisa iterar sobre a coleção e identificar o que você deseja.
List<WebElement> elements = driver.findElements(By.tagName("li"));

for (WebElement element : elements) {
    System.out.println("Paragraph text:" + element.getText());
}
from selenium import webdriver
from selenium.webdriver.common.by import By

driver = webdriver.Firefox()

    # Navegar até a URL
driver.get("https://www.example.com")

    # Obtém todos os elementos disponiveis com o nome da tag 'p'
elements = driver.find_elements(By.TAG_NAME, 'p')

for e in elements:
    print(e.text)
using OpenQA.Selenium;
using OpenQA.Selenium.Firefox;
using System.Collections.Generic;

namespace FindElementsExample {
 class FindElementsExample {
  public static void Main(string[] args) {
   IWebDriver driver = new FirefoxDriver();
   try {
    // Navegar até a URL
    driver.Navigate().GoToUrl("https://example.com");

    // Obtém todos os elementos disponiveis com o nome da tag 'p'
    IList < IWebElement > elements = driver.FindElements(By.TagName("p"));
    foreach(IWebElement e in elements) {
     System.Console.WriteLine(e.Text);
    }

   } finally {
    driver.Quit();
   }
  }
 }
}
require 'selenium-webdriver'
driver = Selenium::WebDriver.for :firefox
begin
     # Navegar até a URL
  driver.get 'https://www.example.com'

     # Obtém todos os elementos disponiveis com o nome da tag 'p'
  elements = driver.find_elements(:tag_name,'p')

  elements.each { |e|
    puts e.text
  }
ensure
  driver.quit
end
const {Builder, By} = require('selenium-webdriver');
(async function example() {
    let driver = await new Builder().forBrowser('firefox').build();
    try {
        // Navegar até a URL
        await driver.get('https://www.example.com');

        // Obtém todos os elementos disponiveis com o nome da tag 'p'
        let elements = await driver.findElements(By.css('p'));
        for(let e of elements) {
            console.log(await e.getText());
        }
    }
    finally {
        await driver.quit();
    }
})();
import org.openqa.selenium.By
import org.openqa.selenium.firefox.FirefoxDriver

fun main() {
    val driver = FirefoxDriver()
    try {
        driver.get("https://example.com")
        // Obtém todos os elementos disponiveis com o nome da tag 'p'
        val elements = driver.findElements(By.tagName("p"))
        for (element in elements) {
            println("Paragraph text:" + element.text)
        }
    } finally {
        driver.quit()
    }
}
Localizar Elementos em um Elemento
Ele é usado para localizar a lista de WebElements filhos correspondentes dentro do contexto do elemento pai. Para realizar isso, o WebElement pai é encadeado com o ‘findElements’ para acessar seus elementos filhos.
  import org.openqa.selenium.By;
  import org.openqa.selenium.WebDriver;
  import org.openqa.selenium.WebElement;
  import org.openqa.selenium.chrome.ChromeDriver;
  import java.util.List;

  public class findElementsFromElement {
      public static void main(String[] args) {
          WebDriver driver = new ChromeDriver();
          try {
              driver.get("https://example.com");

              // Obtém o elemento com o nome da tag 'div'
              WebElement element = driver.findElement(By.tagName("div"));

              // Obtém todos os elementos disponiveis com o nome da tag 'p'
              List<WebElement> elements = element.findElements(By.tagName("p"));
              for (WebElement e : elements) {
                  System.out.println(e.getText());
              }
          } finally {
              driver.quit();
          }
      }
  }
from selenium import webdriver
from selenium.webdriver.common.by import By

driver = webdriver.Chrome()
driver.get("https://www.example.com")

    # Obtém o elemento com o nome da tag 'div'
element = driver.find_element(By.TAG_NAME, 'div')

    # Obtém todos os elementos disponíveis com o nome da tag 'p'
elements = element.find_elements(By.TAG_NAME, 'p')
for e in elements:
    print(e.text)
using OpenQA.Selenium;
using OpenQA.Selenium.Chrome;
using System.Collections.Generic;

namespace FindElementsFromElement {
 class FindElementsFromElement {
  public static void Main(string[] args) {
   IWebDriver driver = new ChromeDriver();
   try {
    driver.Navigate().GoToUrl("https://example.com");

    // Obtém o elemento com o nome da tag 'div'
    IWebElement element = driver.FindElement(By.TagName("div"));

    // Obtém todos os elementos disponíveis com o nome da tag 'p'
    IList < IWebElement > elements = element.FindElements(By.TagName("p"));
    foreach(IWebElement e in elements) {
     System.Console.WriteLine(e.Text);
    }
   } finally {
    driver.Quit();
   }
  }
 }
}
  require 'selenium-webdriver'
  driver = Selenium::WebDriver.for :chrome
  begin
    # Navegar até a URL
    driver.get 'https://www.example.com'

    # Obtém o elemento com o nome da tag 'div'
    element = driver.find_element(:tag_name,'div')

    # Obtém todos os elementos disponíveis com o nome da tag 'p'
    elements = element.find_elements(:tag_name,'p')

    elements.each { |e|
      puts e.text
    }
  ensure
    driver.quit
  end
  const {Builder, By} = require('selenium-webdriver');

  (async function example() {
      let driver = new Builder()
          .forBrowser('chrome')
          .build();

      await driver.get('https://www.example.com');

      //  Obtém o elemento com o nome da tag 'div'
      let element = driver.findElement(By.css("div"));

      // Obtém todos os elementos disponíveis com o nome da tag 'p'
      let elements = await element.findElements(By.css("p"));
      for(let e of elements) {
          console.log(await e.getText());
      }
  })();
  import org.openqa.selenium.By
  import org.openqa.selenium.chrome.ChromeDriver

  fun main() {
      val driver = ChromeDriver()
      try {
          driver.get("https://example.com")

           // Obtém o elemento com o nome da tag 'div'
          val element = driver.findElement(By.tagName("div"))

          // Obtém todos os elementos disponíveis com o nome da tag 'p'
          val elements = element.findElements(By.tagName("p"))
          for (e in elements) {
              println(e.text)
          }
      } finally {
          driver.quit()
      }
  }
Obter elemento ativo
Ele é usado para rastrear (ou) encontrar um elemento DOM que tem o foco no contexto de navegação atual.
  import org.openqa.selenium.*;
  import org.openqa.selenium.chrome.ChromeDriver;

  public class activeElementTest {
    public static void main(String[] args) {
      WebDriver driver = new ChromeDriver();
      try {
        driver.get("http://www.google.com");
        driver.findElement(By.cssSelector("[name='q']")).sendKeys("webElement");

        // Obter atributo do elemento atualmente ativo
        String attr = driver.switchTo().activeElement().getAttribute("title");
        System.out.println(attr);
      } finally {
        driver.quit();
      }
    }
  }
  from selenium import webdriver
  from selenium.webdriver.common.by import By

  driver = webdriver.Chrome()
  driver.get("https://www.google.com")
  driver.find_element(By.CSS_SELECTOR, '[name="q"]').send_keys("webElement")

    # Obter atributo do elemento atualmente ativo
  attr = driver.switch_to.active_element.get_attribute("title")
  print(attr)
    using OpenQA.Selenium;
    using OpenQA.Selenium.Chrome;

    namespace ActiveElement {
     class ActiveElement {
      public static void Main(string[] args) {
       IWebDriver driver = new ChromeDriver();
       try {
        // Navegar até a URL
        driver.Navigate().GoToUrl("https://www.google.com");
        driver.FindElement(By.CssSelector("[name='q']")).SendKeys("webElement");

        // Obter atributo do elemento atualmente ativo
        string attr = driver.SwitchTo().ActiveElement().GetAttribute("title");
        System.Console.WriteLine(attr);
       } finally {
        driver.Quit();
       }
      }
     }
    }
  require 'selenium-webdriver'
  driver = Selenium::WebDriver.for :chrome
  begin
    driver.get 'https://www.google.com'
    driver.find_element(css: '[name="q"]').send_keys('webElement')

    # Obter atributo do elemento atualmente ativo
    attr = driver.switch_to.active_element.attribute('title')
    puts attr
  ensure
    driver.quit
  end
  const {Builder, By} = require('selenium-webdriver');

  (async function example() {
      let driver = await new Builder().forBrowser('chrome').build();
      await driver.get('https://www.google.com');
      await  driver.findElement(By.css('[name="q"]')).sendKeys("webElement");

      // Obter atributo do elemento atualmente ativo
      let attr = await driver.switchTo().activeElement().getAttribute("title");
      console.log(`${attr}`)
  })();
  import org.openqa.selenium.By
  import org.openqa.selenium.chrome.ChromeDriver

  fun main() {
      val driver = ChromeDriver()
      try {
          driver.get("https://www.google.com")
          driver.findElement(By.cssSelector("[name='q']")).sendKeys("webElement")

          // Obter atributo do elemento atualmente ativo
          val attr = driver.switchTo().activeElement().getAttribute("title")
          print(attr)
      } finally {
          driver.quit()
      }
  }
3 - Interacting with web elements
A high-level instruction set for manipulating form controls.
There are only 5 basic commands that can be executed on an element:
- click (applies to any element)
- send keys (only applies to text fields and content editable elements)
- clear (only applies to text fields and content editable elements)
- submit (only applies to form elements)
- select (see Select List Elements)
Additional validations
These methods are designed to closely emulate a user’s experience, so, unlike the Actions API, it attempts to perform two things before attempting the specified action.
- If it determines the element is outside the viewport, it scrolls the element into view, specifically it will align the bottom of the element with the bottom of the viewport.
- It ensures the element is interactable before taking the action. This could mean that the scrolling was unsuccessful, or that the element is not otherwise displayed. Determining if an element is displayed on a page was too difficult to define directly in the webdriver specification, so Selenium sends an execute command with a JavaScript atom that checks for things that would keep the element from being displayed. If it determines an element is not in the viewport, not displayed, not keyboard-interactable, or not pointer-interactable, it returns an element not interactable error.
Click
The element click command is executed on the center of the element. If the center of the element is obscured for some reason, Selenium will return an element click intercepted error.
    // Navigate to Url
    driver.get("https://www.selenium.dev/selenium/web/inputs.html");
	// Click on the element
    driver.findElement(By.name("color_input")).click();
    # Navigate to url
	driver.get("https://www.selenium.dev/selenium/web/inputs.html")

    # Click on the element
	driver.find_element(By.NAME, "color_input").click()
  // Navigate to Url
  driver.Navigate().GoToUrl("https://www.selenium.dev/selenium/web/inputs.html");

  // Click the element
  driver.FindElement(By.Name("color_input")).Click();
    # Navigate to URL
  driver.get 'https://www.selenium.dev/selenium/web/inputs.html'

    # Click the element
  driver.find_element(name: 'color_input').click
    // Navigate to Url
    await driver.get('https://www.selenium.dev/selenium/web/inputs.html');

    // Click the element
    await driver.findElement(By.name('color_input')).click();
    // Navigate to Url
    driver.get("https://www.selenium.dev/selenium/web/inputs.html")

    // Click the element
    driver.findElement(By.name("color_input")).click();
Send keys
The element send keys command
types the provided keys into an editable element.
Typically, this means an element is an input element of a form with a text type or an element
with a content-editable attribute. If it is not editable,
an invalid element state error is returned.
Here is the list of possible keystrokes that WebDriver Supports.
      // Navigate to Url
      driver.get("https://www.selenium.dev/selenium/web/inputs.html");

      // Clear field to empty it from any previous data
      driver.findElement(By.name("email_input")).clear();

	  //Enter Text
	  driver.findElement(By.name("email_input")).sendKeys("admin@localhost.dev");
    # Navigate to url
	driver.get("https://www.selenium.dev/selenium/web/inputs.html")

    # Clear field to empty it from any previous data
	driver.find_element(By.NAME, "email_input").clear()

	# Enter Text
	driver.find_element(By.NAME, "email_input").send_keys("admin@localhost.dev" )
  // Navigate to Url
  driver.Navigate().GoToUrl("https://www.selenium.dev/selenium/web/inputs.html");

  // Clear field to empty it from any previous data
  driver.FindElement(By.Name("email_input")).Clear();

  //Enter Text
  driver.FindElement(By.Name("email_input")).SendKeys("admin@localhost.dev");


}
    # Navigate to URL
	driver.get 'https://www.selenium.dev/selenium/web/inputs.html'

    # Clear field to empty it from any previous data
	driver.find_element(name: 'email_input').clear

	# Enter Text
	driver.find_element(name: 'email_input').send_keys 'admin@localhost.dev'
    // Navigate to Url
    await driver.get('https://www.selenium.dev/selenium/web/inputs.html');

	//Clear field to empty it from any previous data
	await driver.findElement(By.name('email_input')).clear();

    // Enter text
    await driver.findElement(By.name('email_input')).sendKeys('admin@localhost.dev');
    // Navigate to Url
    driver.get("https://www.selenium.dev/selenium/web/inputs.html")

	//Clear field to empty it from any previous data
	driver.findElement(By.name("email_input")).clear()

    // Enter text
    driver.findElement(By.name("email_input")).sendKeys("admin@localhost.dev")
Clear
The element clear command resets the content of an element.
This requires an element to be editable,
and resettable. Typically,
this means an element is an input element of a form with a text type or an element
with acontent-editable attribute. If these conditions are not met,
an invalid element state error is returned.
      // Navigate to Url
      driver.get("https://www.selenium.dev/selenium/web/inputs.html");

      // Clear field to empty it from any previous data
      driver.findElement(By.name("email_input")).clear();
    # Navigate to url
	driver.get("https://www.selenium.dev/selenium/web/inputs.html")

    # Clear field to empty it from any previous data
	driver.find_element(By.NAME, "email_input").clear()
  // Navigate to Url
  driver.Navigate().GoToUrl("https://www.selenium.dev/selenium/web/inputs.html");

  // Clear field to empty it from any previous data
  driver.FindElement(By.Name("email_input")).Clear();


}
    # Navigate to URL
	driver.get 'https://www.selenium.dev/selenium/web/inputs.html'

    # Clear field to empty it from any previous data
	driver.find_element(name: 'email_input').clear
    // Navigate to Url
    await driver.get('https://www.selenium.dev/selenium/web/inputs.html');

	//Clear field to empty it from any previous data
	await driver.findElement(By.name('email_input')).clear();
    // Navigate to Url
    driver.get("https://www.selenium.dev/selenium/web/inputs.html")

	//Clear field to empty it from any previous data
	driver.findElement(By.name("email_input")).clear()
Submit
In Selenium 4 this is no longer implemented with a separate endpoint and functions by executing a script. As such, it is recommended not to use this method and to click the applicable form submission button instead.
4 - Information about web elements
What you can learn about an element.
There are a number of details you can query about a specific element.
Is Displayed
This method is used to check if the connected Element is
displayed on a webpage. Returns a Boolean value,
True if the connected element is displayed in the current
browsing context else returns false.
This functionality is mentioned in, but not defined by the w3c specification due to the impossibility of covering all potential conditions. As such, Selenium cannot expect drivers to implement this functionality directly, and now relies on executing a large JavaScript function directly. This function makes many approximations about an element’s nature and relationship in the tree to return a value.
// Navigate to the url
driver.get("https://www.selenium.dev/selenium/web/inputs.html");

// Get boolean value for is element display
boolean isEmailVisible = driver.findElement(By.name("email_input")).isDisplayed();
# Navigate to the url
driver.get("https://www.selenium.dev/selenium/web/inputs.html")
# Get boolean value for is element display
is_email_visible = driver.find_element(By.NAME, "email_input").is_displayed()//Navigate to the url
driver.Url = "https://www.selenium.dev/selenium/web/inputs.html";
//Get boolean value for is element display
Boolean is_email_visible = driver.FindElement(By.Name("email_input")).Displayed;# Navigate to the url
driver.get("https://www.selenium.dev/selenium/web/inputs.html");
#fetch display status
val = driver.find_element(name: 'email_input').displayed?// Navigate to url
await driver.get("https://www.selenium.dev/selenium/web/inputs.html");
// Resolves Promise and returns boolean value
let result = await driver.findElement(By.name("email_input")).isDisplayed();//navigates to url
driver.get("https://www.selenium.dev/selenium/web/inputs.html")
//returns true if element is displayed else returns false
val flag = driver.findElement(By.name("email_input")).isDisplayed()Is Enabled
This method is used to check if the connected Element is enabled or disabled on a webpage. Returns a boolean value, True if the connected element is enabled in the current browsing context else returns false.
  //navigates to url
  driver.get("https://www.selenium.dev/selenium/web/inputs.html");

  //returns true if element is enabled else returns false
  boolean value = driver.findElement(By.name("button_input")).isEnabled();
    # Navigate to url
driver.get("https://www.selenium.dev/selenium/web/inputs.html")

    # Returns true if element is enabled else returns false
value = driver.find_element(By.NAME, 'button_input').is_enabled()
// Navigate to Url
driver.Navigate().GoToUrl("https://www.selenium.dev/selenium/web/inputs.html");

// Store the WebElement
IWebElement element = driver.FindElement(By.Name("button_input"));

// Prints true if element is enabled else returns false
System.Console.WriteLine(element.Enabled);
    # Navigate to url
driver.get 'https://www.selenium.dev/selenium/web/inputs.html'

    # Returns true if element is enabled else returns false
ele = driver.find_element(name: 'button_input').enabled?
// Navigate to url
await driver.get('https://www.selenium.dev/selenium/web/inputs.html');

// Resolves Promise and returns boolean value
let element =  await driver.findElement(By.name("button_input")).isEnabled();
 //navigates to url
 driver.get("https://www.selenium.dev/selenium/web/inputs.html")

 //returns true if element is enabled else returns false
 val attr = driver.findElement(By.name("button_input")).isEnabled()
Elemento está selecionado
Este método determina se o elemento referenciado é Selected ou não. Este método é amplamente utilizado em caixas de seleção, botões de opção, elementos de entrada e elementos de opção.
Retorna um valor booleano, true se o elemento referenciado for selected no contexto de navegação atual, caso contrário, retorna false.
 //navigates to url
 driver.get("https://www.selenium.dev/selenium/web/inputs.html");

 //returns true if element is checked else returns false
 boolean value = driver.findElement(By.name("checkbox_input")).isSelected();
    # Navigate to url
driver.get("https://www.selenium.dev/selenium/web/inputs.html")

    # Returns true if element is checked else returns false
value = driver.find_element(By.NAME, "checkbox_input").is_selected()
// Navigate to Url
driver.Navigate().GoToUrl("https://www.selenium.dev/selenium/web/inputs.html");

// Returns true if element ins checked else returns false
bool value = driver.FindElement(By.Name("checkbox_input")).Selected;
    # Navigate to url
driver.get 'https://www.selenium.dev/selenium/web/inputs.html'

    # Returns true if element is checked else returns false
ele = driver.find_element(name: "checkbox_input").selected?
// Navigate to url
await driver.get('https://www.selenium.dev/selenium/web/inputs.html');

// Returns true if element ins checked else returns false
let res = await driver.findElement(By.name("checkbox_input")).isSelected();
 //navigates to url
 driver.get("https://www.selenium.dev/selenium/web/inputs.html")

 //returns true if element is checked else returns false
 val attr =  driver.findElement(By.name("checkbox_input")).isSelected()
Coletar TagName do elemento
É usado para buscar o TagName do elemento referenciado que tem o foco no contexto de navegação atual.
 //navigates to url
 driver.get("https://www.selenium.dev/selenium/web/inputs.html");

 //returns TagName of the element
 String value = driver.findElement(By.name("email_input")).getTagName();
    # Navigate to url
driver.get("https://www.selenium.dev/selenium/web/inputs.html")

    # Returns TagName of the element
attr = driver.find_element(By.NAME, "email_input").tag_name
// Navigate to Url
driver.Navigate().GoToUrl("https://www.selenium.dev/selenium/web/inputs.html");

// Returns TagName of the element
string attr = driver.FindElement(By.Name("email_input")).TagName;
    # Navigate to url
driver.get 'https://www.selenium.dev/selenium/web/inputs.html'

    # Returns TagName of the element
attr = driver.find_element(name: "email_input").tag_name
// Navigate to URL
await driver.get('https://www.selenium.dev/selenium/web/inputs.html');

// Returns TagName of the element
let value = await driver.findElement(By.name('email_input')).getTagName();
 //navigates to url
 driver.get("https://www.selenium.dev/selenium/web/inputs.html")

 //returns TagName of the element
 val attr =  driver.findElement(By.name("email_input")).getTagName()
Coletar retângulo do elemento
É usado para buscar as dimensões e coordenadas do elemento referenciado.
O corpo de dados buscado contém os seguintes detalhes:
- Posição do eixo X a partir do canto superior esquerdo do elemento
- posição do eixo y a partir do canto superior esquerdo do elemento
- Altura do elemento
- Largura do elemento
// Navigate to url
driver.get("https://www.selenium.dev/selenium/web/inputs.html");

// Returns height, width, x and y coordinates referenced element
Rectangle res =  driver.findElement(By.name("range_input")).getRect();

// Rectangle class provides getX,getY, getWidth, getHeight methods
System.out.println(res.getX());
    # Navigate to url
driver.get("https://www.selenium.dev/selenium/web/inputs.html")

    # Returns height, width, x and y coordinates referenced element
res = driver.find_element(By.NAME, "range_input").rect
// Navigate to Url
driver.Navigate().GoToUrl("https://www.selenium.dev/selenium/web/inputs.html");

var res = driver.FindElement(By.Name("range_input"));
// Return x and y coordinates referenced element
System.Console.WriteLine(res.Location);
// Returns height, width
System.Console.WriteLine(res.Size);
    # Navigate to url
driver.get 'https://www.selenium.dev/selenium/web/inputs.html'

    # Returns height, width, x and y coordinates referenced element
res = driver.find_element(name: "range_input").rect
// Navigate to url
await driver.get('https://www.selenium.dev/selenium/web/inputs.html');

// Returns height, width, x and y coordinates referenced element
let element =  await driver.findElement(By.name("range_input")).getRect();
// Navigate to url
driver.get("https://www.selenium.dev/selenium/web/inputs.html")

// Returns height, width, x and y coordinates referenced element
val res = driver.findElement(By.name("range_input")).rect

// Rectangle class provides getX,getY, getWidth, getHeight methods
println(res.getX())
Coletar valor CSS do elemento
Recupera o valor da propriedade de estilo computado especificada de um elemento no contexto de navegação atual.
// Navigate to Url
driver.get("https://www.selenium.dev/selenium/web/colorPage.html");

// Retrieves the computed style property 'color' of linktext
String cssValue = driver.findElement(By.id("namedColor")).getCssValue("background-color");
    # Navigate to Url
driver.get('https://www.selenium.dev/selenium/web/colorPage.html')

    # Retrieves the computed style property 'color' of linktext
cssValue = driver.find_element(By.ID, "namedColor").value_of_css_property('background-color')
// Navigate to Url
driver.Navigate().GoToUrl("https://www.selenium.dev/selenium/web/colorPage.html");

// Retrieves the computed style property 'color' of linktext
String cssValue = driver.FindElement(By.Id("namedColor")).GetCssValue("background-color");
    # Navigate to Url
driver.get 'https://www.selenium.dev/selenium/web/colorPage.html'

    # Retrieves the computed style property 'color' of linktext
cssValue = driver.find_element(:id, 'namedColor').css_value('background-color')
// Navigate to Url
await driver.get('https://www.selenium.dev/selenium/web/colorPage.html');

// Retrieves the computed style property 'color' of linktext
let cssValue = await driver.findElement(By.id("namedColor")).getCssValue('background-color');
// Navigate to Url
driver.get("https://www.selenium.dev/selenium/web/colorPage.html")

// Retrieves the computed style property 'color' of linktext
val cssValue = driver.findElement(By.id("namedColor")).getCssValue("background-color")
Coletar texto do elemento
Recupera o texto renderizado do elemento especificado.
// Navigate to url
driver.get("https://www.selenium.dev/selenium/web/linked_image.html");

// Retrieves the text of the element
String text = driver.findElement(By.id("justanotherlink")).getText();
    # Navigate to url
driver.get("https://www.selenium.dev/selenium/web/linked_image.html")

    # Retrieves the text of the element
text = driver.find_element(By.ID, "justanotherlink").text
// Navigate to url
driver.Url="https://www.selenium.dev/selenium/web/linked_image.html";

// Retrieves the text of the element
String text = driver.FindElement(By.Id("justanotherlink")).Text;
    # Navigate to url
driver.get 'https://www.selenium.dev/selenium/web/linked_image.html'

    # Retrieves the text of the element
text = driver.find_element(:id, 'justanotherlink').text
// Navigate to URL
await driver.get('https://www.selenium.dev/selenium/web/linked_image.html');

// retrieves the text of the element
let text = await driver.findElement(By.id('justanotherlink')).getText();
// Navigate to URL
driver.get("https://www.selenium.dev/selenium/web/linked_image.html")

// retrieves the text of the element
val text = driver.findElement(By.id("justanotherlink")).getText()
Fetching Attributes or Properties
Fetches the run time value associated with a DOM attribute. It returns the data associated with the DOM attribute or property of the element.
//Navigate to the url
driver.get("https://www.selenium.dev/selenium/web/inputs.html");

//identify the email text box
WebElement emailTxt = driver.findElement(By.name(("email_input")));

//fetch the value property associated with the textbox
String valueInfo = eleSelLink.getAttribute("value");
# Navigate to the url
driver.get("https://www.selenium.dev/selenium/web/inputs.html")

# Identify the email text box
email_txt = driver.find_element(By.NAME, "email_input")

# Fetch the value property associated with the textbox
value_info = email_txt.get_attribute("value")
 //Navigate to the url
driver.Url="https://www.selenium.dev/selenium/web/inputs.html";

//identify the email text box
IWebElement emailTxt = driver.FindElement(By.Name(("email_input")));

//fetch the value property associated with the textbox
String valueInfo = eleSelLink.GetAttribute("value");
# Navigate to the url
driver.get("https://www.selenium.dev/selenium/web/inputs.html");

#identify the email text box
email_element=driver.find_element(name: 'email_input')

#fetch the value property associated with the textbox
emailVal = email_element.attribute("value");
// Navigate to the Url
await driver.get("https://www.selenium.dev/selenium/web/inputs.html");

// identify the email text box
const emailElement = await driver.findElements(By.xpath('//input[@name="email_input"]'));

//fetch the attribute "name" associated with the textbox
const nameAttribute = await emailElement.getAttribute("name");
// Navigate to URL
driver.get("https://www.selenium.dev/selenium/web/inputs.html")

//fetch the value property associated with the textbox
val attr = driver.findElement(By.name("email_input")).getAttribute("value")
5 - Localizando elementos
Formas de identificar um ou mais elementos no DOM.
Um localizador é uma forma de identificar elementos numa página. São os argumentos passados aos métodos Finders .
Visite os nossas directrizes e recomendações para dicas sobre locators, incluindo quais usar e quando, e também porque é que deve declarar localizadores separadamente dos finders.
Estratégias de seleção de elemento
Existem oito estratégias diferentes de localização de elementos embutidas no WebDriver:
| Localizador | Descrição |
|---|---|
| class name | Localiza elementos cujo nome de classe contém o valor de pesquisa (nomes de classes compostas não são permitidos) |
| css selector | Localiza elementos que correspondem a um seletor CSS |
| id | Localiza elementos cujo atributo de ID corresponde ao valor de pesquisa |
| name | Localiza elementos cujo atributo NAME corresponde ao valor de pesquisa |
| link text | Localiza elementos âncora cujo texto visível corresponde ao valor de pesquisa |
| partial link text | Localiza elementos âncora cujo texto visível contém o valor da pesquisa. Se vários elementos forem correspondentes, apenas o primeiro será selecionado. |
| tag name | Localiza elementos cujo nome de tag corresponde ao valor de pesquisa |
| xpath | Localiza elementos que correspondem a uma expressão XPath |
Creating Locators
To work on a web element using Selenium, we need to first locate it on the web page. Selenium provides us above mentioned ways, using which we can locate element on the page. To understand and create locator we will use the following HTML snippet.
<html>
<body>
<style>
.information {
background-color: white;
color: black;
padding: 10px;
}
</style>
<h2>Contact Selenium</h2>
<form action="/action_page.php">
<input type="radio" name="gender" value="m" />Male
<input type="radio" name="gender" value="f" />Female <br>
<br>
<label for="fname">First name:</label><br>
<input class="information" type="text" id="fname" name="fname" value="Jane"><br><br>
<label for="lname">Last name:</label><br>
<input class="information" type="text" id="lname" name="lname" value="Doe"><br><br>
<label for="newsletter">Newsletter:</label>
<input type="checkbox" name="newsletter" value="1" /><br><br>
<input type="submit" value="Submit">
</form>
<p>To know more about Selenium, visit the official page
<a href ="www.selenium.dev">Selenium Official Page</a>
</p>
</body>
</html>
class name
The HTML page web element can have attribute class. We can see an example in the above shown HTML snippet. We can identify these elements using the class name locator available in Selenium.
    WebDriver driver = new ChromeDriver();
	driver.findElement(By.className("information"));
    driver = webdriver.Chrome()
	driver.find_element(By.CLASS_NAME, "information")
    var driver = new ChromeDriver();
	driver.FindElement(By.ClassName("information"));
    driver = Selenium::WebDriver.for :chrome
	driver.find_element(class: 'information')
    let driver = await new Builder().forBrowser('chrome').build();
	const loc = await driver.findElement(By.className('information'));
    val driver = ChromeDriver()
	val loc: WebElement = driver.findElement(By.className("information"))
css selector
CSS is the language used to style HTML pages. We can use css selector locator strategy to identify the element on the page. If the element has an id, we create the locator as css = #id. Otherwise the format we follow is css =[attribute=value] . Let us see an example from above HTML snippet. We will create locator for First Name textbox, using css.
    WebDriver driver = new ChromeDriver();
	driver.findElement(By.cssSelector("#fname"));
    driver = webdriver.Chrome()
	driver.find_element(By.CSS_SELECTOR, "#fname")
    var driver = new ChromeDriver();
	driver.FindElement(By.CssSelector("#fname"));
    driver = Selenium::WebDriver.for :chrome
	driver.find_element(css: '#fname')
    let driver = await new Builder().forBrowser('chrome').build();
	const loc = await driver.findElement(By.css('#fname'));
    val driver = ChromeDriver()
	val loc: WebElement = driver.findElement(By.css("#fname"))
id
We can use the ID attribute available with element in a web page to locate it. Generally the ID property should be unique for a element on the web page. We will identify the Last Name field using it.
    WebDriver driver = new ChromeDriver();
	driver.findElement(By.id("lname"));
    driver = webdriver.Chrome()
	driver.find_element(By.ID, "lname")
    var driver = new ChromeDriver();
	driver.FindElement(By.Id("lname"));
    driver = Selenium::WebDriver.for :chrome
	driver.find_element(id: 'lname')
    let driver = await new Builder().forBrowser('chrome').build();
	const loc = await driver.findElement(By.id('lname'));
    val driver = ChromeDriver()
	val loc: WebElement = driver.findElement(By.id("lname"))
name
We can use the NAME attribute available with element in a web page to locate it. Generally the NAME property should be unique for a element on the web page. We will identify the Newsletter checkbox using it.
    WebDriver driver = new ChromeDriver();
	driver.findElement(By.name("newsletter"));
    driver = webdriver.Chrome()
	driver.find_element(By.NAME, "newsletter")
    var driver = new ChromeDriver();
	driver.FindElement(By.Name("newsletter"));
    driver = Selenium::WebDriver.for :chrome
	driver.find_element(name: 'newsletter')
    let driver = await new Builder().forBrowser('chrome').build();
	const loc = await driver.findElement(By.name('newsletter'));
    val driver = ChromeDriver()
	val loc: WebElement = driver.findElement(By.name("newsletter"))
link text
If the element we want to locate is a link, we can use the link text locator to identify it on the web page. The link text is the text displayed of the link. In the HTML snippet shared, we have a link available, lets see how will we locate it.
    WebDriver driver = new ChromeDriver();
	driver.findElement(By.linkText("Selenium Official Page"));
    driver = webdriver.Chrome()
	driver.find_element(By.LINK_TEXT, "Selenium Official Page")
    var driver = new ChromeDriver();
	driver.FindElement(By.LinkText("Selenium Official Page"));
    driver = Selenium::WebDriver.for :chrome
	driver.find_element(link_text: 'Selenium Official Page')
    let driver = await new Builder().forBrowser('chrome').build();
	const loc = await driver.findElement(By.linkText('Selenium Official Page'));
    val driver = ChromeDriver()
	val loc: WebElement = driver.findElement(By.linkText("Selenium Official Page"))
partial link text
If the element we want to locate is a link, we can use the partial link text locator to identify it on the web page. The link text is the text displayed of the link. We can pass partial text as value. In the HTML snippet shared, we have a link available, lets see how will we locate it.
    WebDriver driver = new ChromeDriver();
	driver.findElement(By.partialLinkText("Official Page"));
    driver = webdriver.Chrome()
	driver.find_element(By.PARTIAL_LINK_TEXT, "Official Page")
    var driver = new ChromeDriver();
	driver.FindElement(By.PartialLinkText("Official Page"));
    driver = Selenium::WebDriver.for :chrome
	driver.find_element(partial_link_text: 'Official Page')
    let driver = await new Builder().forBrowser('chrome').build();
	const loc = await driver.findElement(By.partialLinkText('Official Page'));
    val driver = ChromeDriver()
	val loc: WebElement = driver.findElement(By.partialLinkText("Official Page"))
tag name
We can use the HTML TAG itself as a locator to identify the web element on the page. From the above HTML snippet shared, lets identify the link, using its html tag “a”.
    WebDriver driver = new ChromeDriver();
	driver.findElement(By.tagName("a"));
    driver = webdriver.Chrome()
	driver.find_element(By.TAG_NAME, "a")
    var driver = new ChromeDriver();
	driver.FindElement(By.TagName("a"));
    driver = Selenium::WebDriver.for :chrome
	driver.find_element(tag_name: 'a')
    let driver = await new Builder().forBrowser('chrome').build();
	const loc = await driver.findElement(By.tagName('a'));
    val driver = ChromeDriver()
	val loc: WebElement = driver.findElement(By.tagName("a"))
xpath
A HTML document can be considered as a XML document, and then we can use xpath which will be the path traversed to reach the element of interest to locate the element. The XPath could be absolute xpath, which is created from the root of the document. Example - /html/form/input[1]. This will return the male radio button. Or the xpath could be relative. Example- //input[@name=‘fname’]. This will return the first name text box. Let us create locator for female radio button using xpath.
    WebDriver driver = new ChromeDriver();
	driver.findElement(By.xpath("//input[@value='f']"));
    driver = webdriver.Chrome()
	driver.find_element(By.XPATH, "//input[@value='f']")
    var driver = new ChromeDriver();
	driver.FindElement(By.Xpath("//input[@value='f']"));
    driver = Selenium::WebDriver.for :chrome
	driver.find_element(xpath: '//input[@value='f']')
    let driver = await new Builder().forBrowser('chrome').build();
	const loc = await driver.findElement(By.xpath('//input[@value='f']'));
    val driver = ChromeDriver()
	val loc: WebElement = driver.findElement(By.xpath('//input[@value='f']'))
Relative Locators
Selenium 4 introduces Relative Locators (previously called as Friendly Locators). These locators are helpful when it is not easy to construct a locator for the desired element, but easy to describe spatially where the element is in relation to an element that does have an easily constructed locator.
How it works
Selenium uses the JavaScript function
getBoundingClientRect()
to determine the size and position of elements on the page, and can use this information to locate neighboring elements.
find the relative elements.
Relative locator methods can take as the argument for the point of origin, either a previously located element reference, or another locator. In these examples we’ll be using locators only, but you could swap the locator in the final method with an element object and it will work the same.
Let us consider the below example for understanding the relative locators.
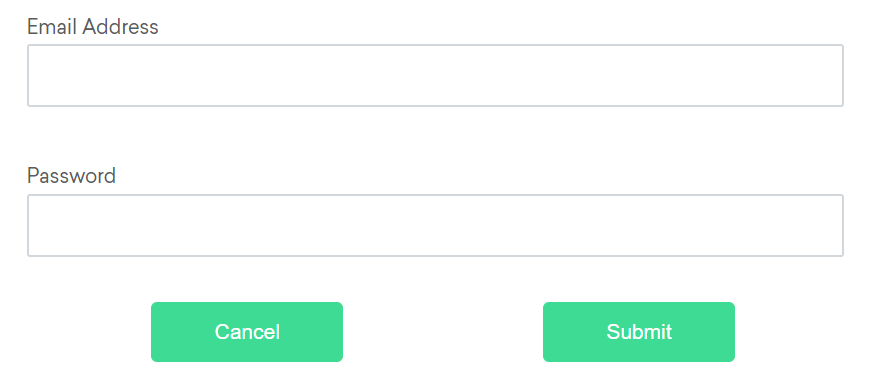
Available relative locators
Above
If the email text field element is not easily identifiable for some reason, but the password text field element is, we can locate the text field element using the fact that it is an “input” element “above” the password element.
By emailLocator = RelativeLocator.with(By.tagName("input")).above(By.id("password"));email_locator = locate_with(By.TAG_NAME, "input").above({By.ID: "password"})var emailLocator = RelativeBy.WithLocator(By.TagName("input")).Above(By.Id("password"));email_locator = {relative: {tag_name: 'input', above: {id: 'password'}}}let emailLocator = locateWith(By.tagName('input')).above(By.id('password'));val emailLocator = RelativeLocator.with(By.tagName("input")).above(By.id("password"))Below
If the password text field element is not easily identifiable for some reason, but the email text field element is, we can locate the text field element using the fact that it is an “input” element “below” the email element.
By passwordLocator = RelativeLocator.with(By.tagName("input")).below(By.id("email"));password_locator = locate_with(By.TAG_NAME, "input").below({By.ID: "email"})var passwordLocator = RelativeBy.WithLocator(By.TagName("input")).Below(By.Id("email"));password_locator = {relative: {tag_name: 'input', below: {id: 'email'}}}let passwordLocator = locateWith(By.tagName('input')).below(By.id('email'));val passwordLocator = RelativeLocator.with(By.tagName("input")).below(By.id("email"))Left of
If the cancel button is not easily identifiable for some reason, but the submit button element is, we can locate the cancel button element using the fact that it is a “button” element to the “left of” the submit element.
By cancelLocator = RelativeLocator.with(By.tagName("button")).toLeftOf(By.id("submit"));cancel_locator = locate_with(By.TAG_NAME, "button").to_left_of({By.ID: "submit"})var cancelLocator = RelativeBy.WithLocator(By.tagName("button")).LeftOf(By.Id("submit"));cancel_locator = {relative: {tag_name: 'button', left: {id: 'submit'}}}let cancelLocator = locateWith(By.tagName('button')).toLeftOf(By.id('submit'));val cancelLocator = RelativeLocator.with(By.tagName("button")).toLeftOf(By.id("submit"))Right of
If the submit button is not easily identifiable for some reason, but the cancel button element is, we can locate the submit button element using the fact that it is a “button” element “to the right of” the cancel element.
By submitLocator = RelativeLocator.with(By.tagName("button")).toRightOf(By.id("cancel"));submit_locator = locate_with(By.TAG_NAME, "button").to_right_of({By.ID: "cancel"})var submitLocator = RelativeBy.WithLocator(By.tagName("button")).RightOf(By.Id("cancel"));submit_locator = {relative: {tag_name: 'button', right: {id: 'cancel'}}}let submitLocator = locateWith(By.tagName('button')).toRightOf(By.id('cancel'));val submitLocator = RelativeLocator.with(By.tagName("button")).toRightOf(By.id("cancel"))Near
If the relative positioning is not obvious, or it varies based on window size, you can use the near method to
identify an element that is at most 50px away from the provided locator.
One great use case for this is to work with a form element that doesn’t have an easily constructed locator,
but its associated input label element does.
By emailLocator = RelativeLocator.with(By.tagName("input")).near(By.id("lbl-email"));email_locator = locate_with(By.TAG_NAME, "input").near({By.ID: "lbl-email"})var emailLocator = RelativeBy.WithLocator(By.tagName("input")).Near(By.Id("lbl-email"));email_locator = {relative: {tag_name: 'input', near: {id: 'lbl-email'}}}let emailLocator = locateWith(By.tagName('input')).near(By.id('lbl-email'));val emailLocator = RelativeLocator.with(By.tagName("input")).near(By.id("lbl-email"));Chaining relative locators
You can also chain locators if needed. Sometimes the element is most easily identified as being both above/below one element and right/left of another.
By submitLocator = RelativeLocator.with(By.tagName("button")).below(By.id("email")).toRightOf(By.id("cancel"));submit_locator = locate_with(By.TAG_NAME, "button").below({By.ID: "email"}).to_right_of({By.ID: "cancel"})var submitLocator = RelativeBy.WithLocator(By.tagName("button")).Below(By.Id("email")).RightOf(By.Id("cancel"));submit_locator = {relative: {tag_name: 'button', below: {id: 'email'}, right: {id: 'cancel'}}}let submitLocator = locateWith(By.tagName('button')).below(By.id('email')).toRightOf(By.id('cancel'));val submitLocator = RelativeLocator.with(By.tagName("button")).below(By.id("email")).toRightOf(By.id("cancel"))